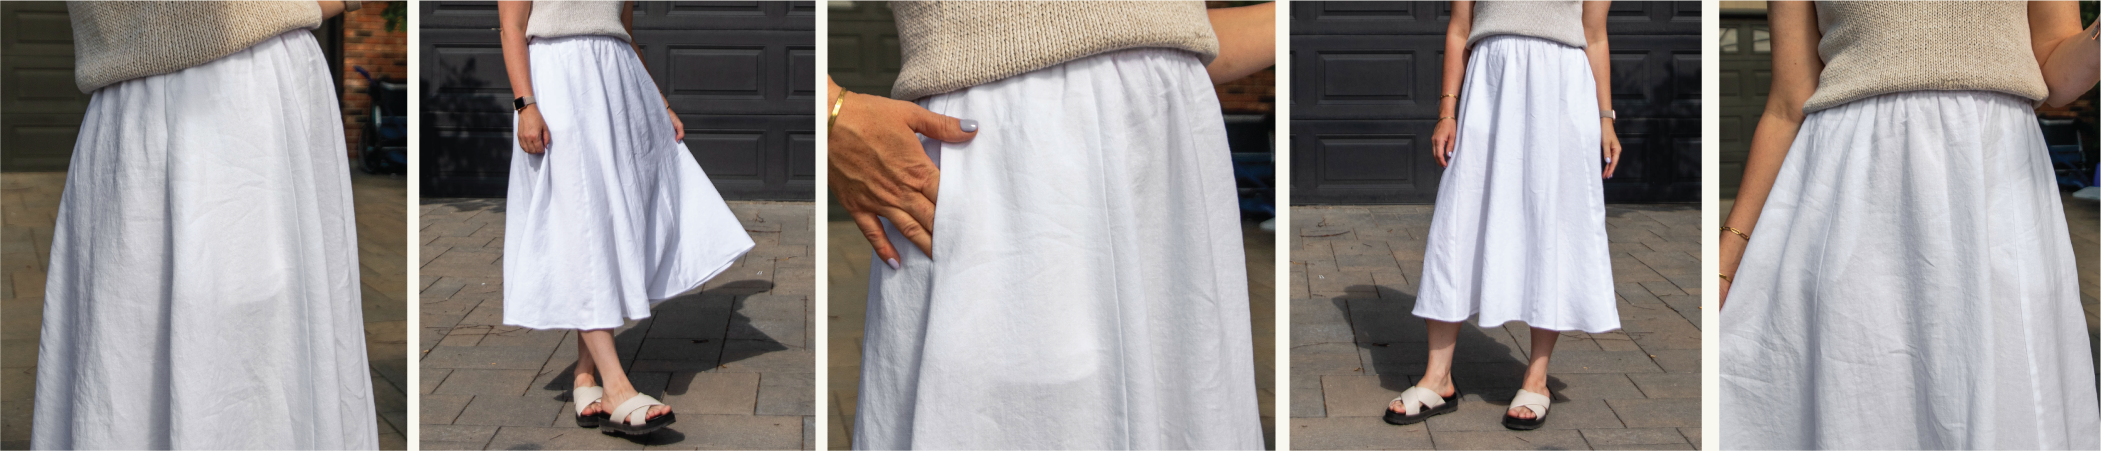
A few weeks ago, I became completely fixated on the idea of a long white skirt. Like, had-to-have-it levels of obsession. Naturally, I turned to the Elsie skirt pattern and decided to make it longer. Three versions later, because of course it took three, I finally got it right. First one? Too tight. Second? Swooshy, but see-through. Third? Heavy linen perfection. Somewhere in there, I also realized the original pocket design (which I still love!) was stealing the spotlight a bit too much. It’s a statement, and I needed something a little quieter. A more subtle, practical option felt better here.

So in this post, I’ll walk you through how I lengthened the Elsie skirt and added simple in-seam pockets. There’s even a free downloadable pattern piece if you want to try it yourself.
Pattern Adjustments
The Elsie Skirt does not include lengthen/shorten lines because, with this design, you can place them almost anywhere. When I tried the slash-and-spread method to add length, I found it took away more fullness from the middle of the skirt than I liked. I’ve tried to show this in the illustration below, but it is tricky to see at this small scale. You’ll just have to trust me on this one. To keep all the fullness, I chose to extend the seam lines at the hem and add 4" (10 cm) right along the bottom edge for each skirt body pattern piece instead.

If you are adding an inseam pocket, you will need to combine the Pocket Bag and Side Front pieces into the New Side Front panel. You can retrace the two pieces together, or simply overlap them, matching top edges and notches, and pin them to the fabric together. No tracing required.

For my inseam pocket, I drafted one that matches the front side panel perfectly. You do not need to do this - you can just download it here! One note of caution, inseam pockets use a different set of notches. The pocket pattern piece includes them, but the existing Front and Back Side panels do not. To add them, line up the inseam pocket with the top of the side panels and copy the notches. Or, skip this step and use the notches on the pocket only, since they are really only needed in step 1 of the instructions below.
Can you use these pockets for either view? Yes, you can!
Sewing
Complete steps 4, 10, and 11 in the instructions before moving on to the steps below. Then work through the first six steps for each pocket, assembling both at the same time or one after the other.

1. With right sides together, align one pocket piece to the side edge of the side panel, matching the top edges. Pin in place and sew between the pocket notches only.

2. Clip into the seam allowance at the pocket notches, cutting up to the seam line without cutting through the stitching. Finish the seam allowance between the notches only, using your preferred method.

3. Press the pocket away from the skirt. Understitch between the notches only, catching the seam allowances underneath.

4. Flip the pocket to the wrong side of the skirt front and press it in place.

5. With right sides together, place the second pocket piece on top of the attached one, aligning the raw edges. Pin in place. Sew around the side and curved bottom with a ½” (1.3 cm) seam allowance, leaving the top open as it will be caught in the waistband. Finish seam allowances using your preferred method.

6. Press the pocket in place behind the skirt front. Baste the pocket to the top of the skirt using a regular stitch length and a ¼” (0.6 cm) seam allowance.

7. With right sides together, align and pin the front and back side seams. Sew with a ½” (1.3 cm) seam allowance, taking care not to catch the pocket in your stitching. Finish the seam allowances together using your preferred method, and press toward the back.
Tip: Before finishing the seam allowances, check the pocket opening from the right side. If the seam sits too far from the top or bottom of the pocket, sew an extra line of stitching closer to the opening. If you have accidentally caught the pocket opening in your stitching, unpick that section and resew slightly further away.
Ta-da! The skirt is done. Continue to step 16 for View A and step 13 for View B in the instructions booklet, and let me know if you give this hack a try. I’d love to see your version!
- Anya